
A Quick Breakdown
By: George Argyropoulos
a/k/a Dragon Bane

This is just going to be a quick breakdown of the 100 target in Arms Race to hopefully help some people mitigate some damage. There are other paths and more successful builds, but I only have experience with what I have, so hopefully I can help some players with this. And I'm sort of insistant on driving stacked because, well, I'm lazy. And obstinate.
The first thing I do is take out the front right hand turret cluster. Rather than approach from the front, I go to the side in between the mines. This offers you the chance to engage these turrets without exposing yourself to fire from the turret cluster on the front left.

The only drawback to this is that you either have to run over the mine to get out or wait to time out. Since hitting the mine gives me 20-30 min of damage, I opt to time out and come back in.
The other option, if your tank is good enough (like a Zelos) is to go into the middle and hit it on the side... but to continue...
Once I'm back in and stacked I don't engage the left front turrets cluster, instead I scoot around the dead right hand turret cluster and go into the gap so as to engage the center turret cluster from behind.
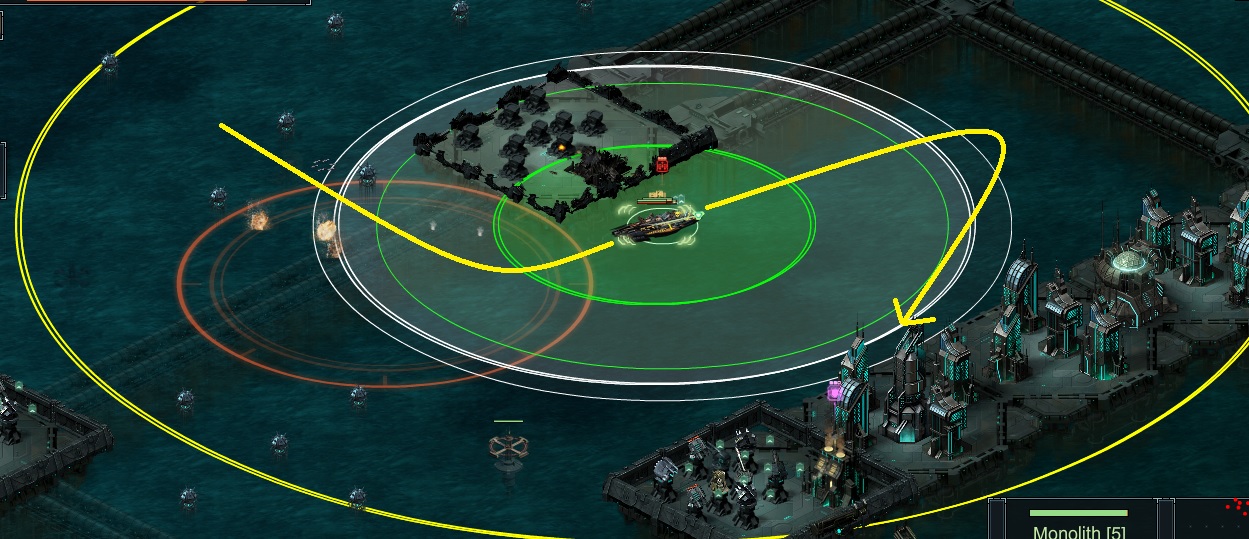
This lessens my chances of activating the bloody Coldsnap and again keeps me out of two turret clusters firing on me at the same time.

Doing this also leaves my fleet in an ideal position - it allows me to go back to that second turret cluster on the left and engage it from the back as well.

Then it's off to race past the shrouded mess to pop into the corner beside the next turret cluster. You have to be stacked to get past the shrouded turrets to avoid damage and you need to end up in the corner so as to avoid getting hit by the Coldsnap.

Once there, you can turn just enough to get the Executioner in range and wipe out this cluster. This will also unshroud the mess you just raced past.
Noob tip: You do not have to kill the unshrouded turrets (Thanks to Skadi Nilson for the tip!). They offer no points. If you don't need the fleets that come in to do any cleaning for you, you can ignore them and continue on. If you need or rely on the fleets to do some cleaning up for you, go back and kill them now so you know how the fleets will proceed.

Next we have to go all the way against the 'wall' of the target and hug it to sneak past the mines so as to engage the next cluster from behind as well.


Then we go to the bottom, hug that wall and engage. There is an issue here as if you are heavy on explosive damage and lower on splash (like this build), you will need to pinch what's left to kill it off. Be forewarned - small pinches do work but the window of opportunity is very small.


After this one, we have one cluster left and you can engage this from a good angle as well. Don't be like me and forget the big building off to the side.

After this it is just a matter of cleaning up the fleets. I tend to stay moving and try and kite them.
This is the latest video of a 100 run. Total damage was about 20 minutes.
The build used in the video:
https://www.dahippo.com/bp/ship/#!y400O0042434303170C445P3852505G572A2A2A2A0NY042434303386M722Y6YC5C557C537C5C5C50NY042434303386M722Y6YC5C557C537C5C5C50NY042434303386M722Y6YC5C557C537C5C5C50NY042434303386M722Y6YC5C557C537C5C5C5dD
Hope this helps some of you! Good luck!
No comments:
Post a Comment