Tuesday, May 23, 2017

Anatomy of Design : Monolith

Taking One Last Crack at Refitting the Mono Fleet


By: George Argyropoulos
a/k/a Dragon_Bane  

As many players have noted, we have had a little bit of a tumultuous raid series. We have seen the Charged Armors and the Gridiron Monolith have their fundamental mechanics changed. The Monolith and the Combat Mortar O/U-10 get buffs and now we have a new mortar that has been introduced in the Forsaken Mission.

Things do seem to be settling down, so I think it's safe-ish to do an article for the Monolith fleet. After looking at the new mortar and the targets we saw in the last Raid, I have come up with this build (LINK):


Keep in mind, the fleet build is designed so that I can be lazy and stack the fleet when I drive. As you can see I have opted to refit to the new mortars. There are a few reasons for this:


  • The D85-D has a higher DPS.
  • It allows me to squeeze on another mortar overall in the build.
  • It increases my overall splash.


The armors are all charged armors. This allows me to maximize damage potential on the hull due to the weight savings associated with these armors in addition to the benefits they provide with regard to damage mitigation and no repair.

The specials have been selected based on what we saw in the last raid. Reactive Armor 3 seemed to perform better overall in the targets, particularly when you avoided the Cold Snap turrets.

I used High Velocity Rounds and Combustion System 2 to increase my projectile speed and add a little spread to take advantage of the splash mechanic (see this article for more info).

The Hydraulic Resistors can be replaced with Speed System 5, I just keep using the Hydraulic Resistors out of habit. Bad pirate!

The one special that I am torn about is the Explosive Upgrade. I am torn between its use and Splash upgrade. Both fit in this design and I may change that special out if the new S target necessitates it.

I posted this build on the TFC page earlier to give players that drove stacked an option to look at and it engendered some good discussion. I'll address some of the questions that came up there below.

Q: Why don't you use X build instead?

A: There are some solid options out there. This is not the be all end all of design, it's just mine. I designed this for minimum refit time from what I had from last raid while trying to maximize the damage output. I also designed this to run with a Gridiron Monolith and not a Zelos, though I do also have a Zelos tank built. Part of this build was to cram as many of the new mortar as possible onto the build, as maximizing damage and DPS seemed to be key in mitigating overall damage to your fleet in the last raid.

Again, a lot of this particular design is the understanding that I am driving stacked. There are a good number of solid builds for the Monolith out there. Choose the one that you think will fit your driving style and abilities.

Q: Why does X build give more DPS in Huggy's?

A: I'm not sure how Huggy's calculates DPS for mortars, but I used my own calculations of DPS in conjunction with the calculations Brian and I produced in the article linked above. In Huggy's the more splash you have the higher the DPS, however, as you can see from the article, this method does not translate well into actual game play. Another thing to consider is to pop over to fleet view and see how each design stacks up with overall fleet damage. Sometimes you may get one or two hulls in a fleet to get outrageous numbers only to find that the fleet under-performs another design when looking at the big picture.

Q: Why aren't you using Tridents? You had them on your Icebreaker build.

A: The use of Tridents was to mitigate the Cold Snaps as we saw them in the Preview Servers. The turrets changed in the first iteration of the raid essentially negating their use. With this fleet, if you drive properly, you will not get hit by the Cold Snaps so you will not need the Tridents. This is also why I am using Reactive Armor 3.

Q: My O/U-10 Mono fleet did well last raid, why the switch?

A: Mine did as well, however, I am a lazy pirate and I think the loss of a month of refit time will translate into an easier time for me in the new FM targets which we will see after the next raid. If this refit makes the FM easier for me for the next year to come it will have been time well invested. It is a gamble, but so are a lot of builds.

Q: Can I use a Zelos as a tank? Is it better?

A: Of course you can, you just have to adjust your driving. As for 'better'... numbers-wise it would seem so. The Duality Countermeasure also can fire at a single missile more than once so long as that missile has not been fired upon by another countermeasure. Looking at the performances from last raid, the end results were very similar with either tank. I believe a lot of this decision will fall to personal preference, driving style and driving skill.

Q: Why are you armoring the Monoliths?

A: I am not driving them traditionally as a tank and back line, I am driving them fully stacked. As such, the stacking mechanic is dubious in the game and necessitates some measures to be taken to mitigate damage when the fleets drift out of stack.

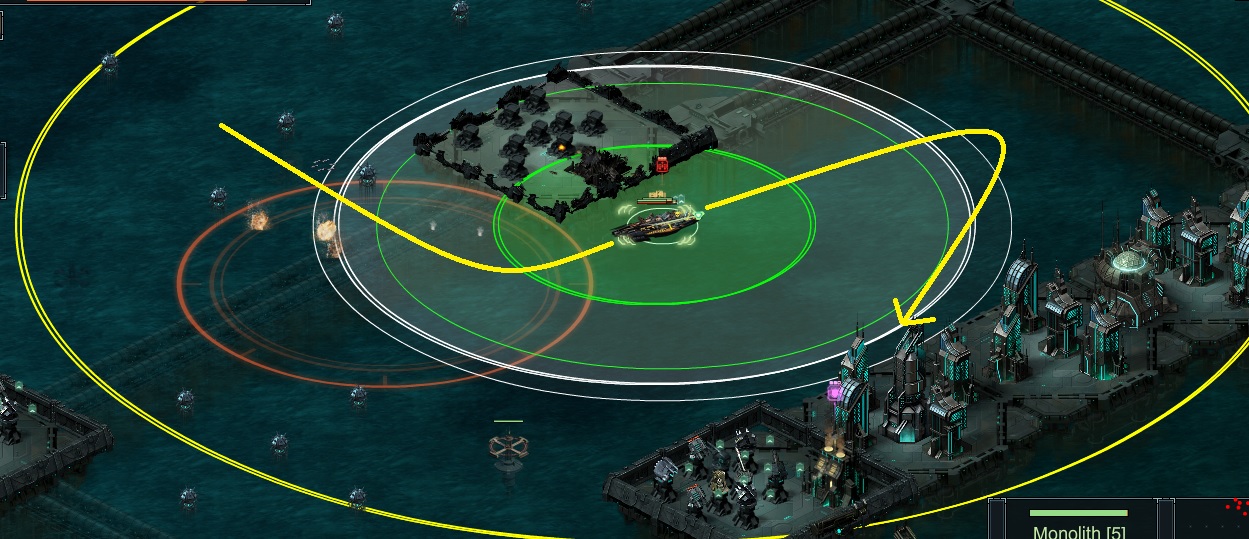
Q: Is the Spread and Splash enough to kill adjacent turrets?

A: The only cluster I had issue with was the bottom cluster in the 100. A pinch solved that problem for me. Will that be better with this build? I'm not sure. It is one of the reasons I am torn between Explosive Upgrade and Splash Upgrade in that last special slot. We also have not seen the second S target and that may play a significant role in this decision. Here is a run in the 100 last raid with the O/U build:


Q: What if I don't have charged armors?

A: This one is tricky. You will have to adjust the build in order to fit traditional armors. This will reduce the efficiency of the build, but I think it can still be done with some acceptable numbers. It is the one drawback of the change to the Charged Armors that I do not like in that, it seems that, not having the armors puts players at a disadvantage rather than players with the armor gaining a 'luxury' advantage. Maybe this perception is derived from the perception that the targets are designed around having the charged armors - and that is merely our opinions, we don't know that for a fact, so this perception is compounded by assumption... see where that leads?

As for a build? This one seems to work very well, though the Zelos has been testing better.

So, I hope this helps some people in deciding if they want to refit, what they want to look at if they do decide to refit and maybe spur some ideas in others. I hope it helps!

Monday, May 22, 2017

Spread and Splash - A Story of Co-Dependence

Demystifying this Relationship


By: George Argyropoulos
a/k/a Dragon_Bane   


There are times when a subject matter comes up that, in my mind, is easy to envision, yet when I try to articulate an explanation it turns out more complex than what I see in my mind. Spread and Splash in in that category.

Spread : 

Spread is defined as the area that the projectiles will hit within. Projectiles may hit in the center of this area or they may hit to the edge of this area.  When we look at stats, Spread is given as an absolute number, however, in order to understand the interactions, you have to convert that number into actual spread off-center. To do this you have to divide your spread number by 5 (this info is directly from Kixeye).

For example, if your build has an absolute spread of 90, the true spread from the center point of your targeting would only be 18 (90 divided by 5). It would look something like this:


It is a much smaller area than the absolute number would lead you to believe. Spread is merely the 'drift' of your projectile from center point of your targeting. In the past, most players would want a higher spread in order to take advantage of the splash mechanic. With the advent of Scatterguns there has been an introduction of more specials that have mitigated spread to allow a narrower and more concentrated area of fire. This allows one to tweak both spread and splash more precisely in their builds. To determine which path you want to follow, one must look at the intended target, weapon selection and the amount of splash your build has in order to determine an optimal build.

Splash :

Splash is the area that is damages . While spread is where a projectile may land with regard to a specific targeted spot, Splash is the damage that radiates out from that point of projectile impact. This is what we see when we target a ship or turret and our mortars or scatterguns damage and sometimes destroy nearby turrets, ships and walls. The higher the Splash the further out the damage reaches.

Splash is an interesting mechanic in that damage is a linear drop off from point of impact. In other words, at the impact point (center of your Splash circle), you will have 100% damage and the further away you progress from the center, the less damage will be dealt. Generally, the drop off at the edge of the splash radius is 50% of the damage of the weapon (old mortars value). Some are more, some are less, but the drop off is always linear.

For example, a hull with a total splash of 54.8 (Weird number, I know, but I'm using a specific build.) and damage of 1,000 per shell will have that amount halved to 500 at the 55 range (outer edge of the Splash circle) and at the mid-point of the range (27.4) the damage would be 750.


The general consensus is to always increase your splash as much as possible. As 'standard' wisdom in the game, many players do not realize why this bit of wisdom makes your weaponry more effective. In essence, you want your weapons to hit your target so that the inner ring is what is dealing the damage. The closer to the center, the more damage is imparted. This then begets the question of spread v. splash and is a perfect segue...

Spread v. Splash : 

This is where you can really start tuning your builds. Several nights ago I was fiddling with the idea of spread and splash and was plotting various combinations on some graph paper. I had seen BP Professor's equation, but not knowing the how that calculation was derived I decided to elicit some help from one of the math gurus, TFC's own Brian 'I'm gonna flip a table' Randich. To say that we geeked out a bit would be putting it mildly. He started getting into calculations that I couldn't follow and that brought us to the point of wanting to distill the info into some simple equations. This is what we came up with.

Coverage Efficiency = Splash / (2*(spread/5))

Damage Density = .5 * Splash / (2*(spread/5))

(These are relational equations based solely on known mechanics and may not accurately reflect actual in game performance due to unknown factors ranging from RNG to actual min. damage % of weapons to enemy armor. M'kay?)

To illustrate the interactions, we can use an outlier hit of a mortar (a mortar that hits at the very edge of our Spread) for reference while we plot the various calculations.


The first calculation (Coverage Efficiency) should give you an effective coverage percentage for your weapons. Using the above example you would calculate 54.8 / 36 = 152% meaning that your weapons would cover over 100% of the spread radius in damage and that you would guarantee hitting anything (standing still) at the point of targeting. This is reflected above by the red ring.

The second calculation (Damage Density) will give you an idea of how efficient the damage dealt would be from this build. Again, using the above example we would get 27.4 / 36 =  76%. This percentage would reflect the amount of your weapons that would damage anything (standing still) at the point of impact with the 'inner ring' of damage. This allows you to tune your build to maximize this damage. This is reflected above by the orange ring.

As you can see, the relationship between these two mechanics is a little more complex than one would initially consider. Hopefully, in now knowing their interactions, you can more efficiently build toward your intended target and fine tune builds to maximize your available options when building.

And to steal a friend's line:

TL;DR:

- Always increase Splash.

- Spread is a choice. Make sure it's a good one.

Saturday, May 20, 2017

To Math or Not to Math....

Calculating DPS All on Your Own

By: Brian Randich
a/k/a Brian_R


When someone is asked to calculate DPS (Damage Per Second), they normally either recoil in horror or shout about how the new things are worse than the old things without showing their work.  It is seen as either so difficult that the number seems to come out of thin air, as if by magic, or so easy that it can be done in an instant, as simple as blinking or breathing.  The truth is, calculating DPS is somewhere between the two.  While it can veer towards borderline magic, especially when you’re trying to calculate precisely which build is better, there’s no arithmancy (ἀριθμομαντεία) here.  Anyone can do a simple DPS calculation quickly, and with a short formula.  The device you are viewing this on has a calculator built-in, so it’s time to put it to use.

While DPS does stand for damage per second (not damage per shot or damage per salvo), it is not always found by just dividing the damage by the reload.  First, we have to find the “cycle time” of the weapon.  The weapon’s cycle time is how long it takes between firing its first shot and firing its first shot again after reloading.  If a weapon only fires one shot before reloading, then this is simply its reload speed.

However, more and more weapons, especially the mortars and rockets that are used in Garrison Raids and the Forsaken Missions, are getting salvo numbers larger than 1. The salvo is how many projectiles a weapon fires in sequence before it starts to reload.  (This is different from multi-shot, where all the pellets fire at once.)  A salvo of 3 for a rocket means the rocket will fire one rocket, then fire a second rocket, then fire a third rocket, then reload.

This game mechanic is so important it gets its own paragraph, as it is where I see the most mistakes made when people do DPS calculations.  After shooting, any weapon must wait 0.2 seconds before shooting again.  This amount cannot be reduced by any means.  It is a limitation of the game engine, and cannot be worked around.  This means that the above rocket with a salvo of 3 will act like this:

Fire rocket one, 0.2 second pause, fire rocket two, 0.2 second pause, fire rocket 3, reload, repeat

Those two 0.2 second pauses have to be taken into account when calculating DPS.  Adding those pauses along with the weapon reload speed gets the weapon’s cycle time.  If your rocket is the new D100-V with a reload of 2 seconds, its cycle time becomes 2+0.2+0.2 = 2.4 seconds.  The basic calculation of DPS is damage divided by cycle time.  Keeping the D100-V, 11,844/2.4 = 4,935 DPS.  To compare, the D100-S is 6,672/1.4 = 4,766 DPS.  If the weapon has an accuracy value and no splash value, multiply that number by the weapon’s accuracy to get its actual DPS (as the weapon may miss sometimes if it’s not hitting buildings).  This one doesn’t, so we can stop here.

To recap:
DPS = (Damage / Cycle time) * Accuracy = (Damage / (Reload + (0.2*(Salvo-1))) * Accuracy
This may look scary, but all of these numbers are on the weapon blueprint, so it’s relatively easy to figure out.

A slightly more complicated version involves calculating the reload of the weapon when it’s on the hull it’s meant to be on.  This involves looking at a particular hull to find its reload bonus for a weapon type.  For example, at the time of writing this, the Icebreaker has a rocket reload increase of 100%.  The hull also has a special field that increases rocket reload by 10% more for each Icebreaker in the fleet.  Let’s say you have all five Icebreakers, for an extra 50%, giving you a total reload bonus of 150%.  Now, the hull’s rank also affects its reload.  I still use the BP Professor’s formula to calculate reload:

Actual weapon reload = Reload * (1-rank firing bonus %) / (1+all reload bonuses)

Now, let’s try this with our D100-V (2 second reload), on a skulled (rank firing bonus = 75%) Icebreaker with five in a fleet (150% total reload bonus)

2 * (1-75%) / (1+150%) = 2 * (0.25) / (2.5) = 0.5 / 2.5 = 0.2

Perfect!  We get to exactly the minimum reload.  Try this with the D100-S (1 second reload), and we get:

1 * (1-75%) / (1+150%) = 0.25/2.5 = 0.1

This is not optimal.  Some of the reload bonuses go to waste, as we have to wait 0.2 seconds before firing again.  As it turns out, these two weapons on the same setup (skulled, all 5 Icebreakers) would have the same cycle time.  There are two 0.2 second pauses between rockets 1 and 2 and rockets 2 and 3, and the weapon takes 0.2 seconds to reload.  Both spit out rockets as fast as the game allows, and the D100-V’s base damage is higher, so it should do better in-game.

So, now we have ways to calculate a weapon’s DPS based only on its blueprint to see which would do better in theory, and a relatively simple way to calculate the DPS based on what ship the weapon is used on to get an idea of what we should put on each actual ship.  Now, the game has a lot of different specials, weapons, tactical fields, and other interactions that apply when actually putting a fleet together.  Monoliths are a perfect example of this, as I had once proven that they had lower DPS with the Gridiron Monolith than the Citadels were with the Harlock’s Citadel.  I am claiming some credit in causing the recent buff to Monoliths and the O/U-10 mortar.  But the question then becomes, how to calculate DPS for a ship and ALL of its parts?  Would something like an explosive upgrade that allows me to fit an extra mortar on due to the low weapon weight the explosive upgrade requires do more damage than using a different explosive damage special?  All of these questions can be answered with a very long equation for DPS.  I don’t want to call it the be-all end-all in case I missed something, but it’s as close as I think I can get.

WARNING!  ADVANCED MATH AHEAD!  WARNING!  ADVANCED MATH AHEAD!


Using this equation requires mocking up a ship build in Kixeye’s ship designer, and paying very close attention to the “attack,” “special abilities,” and “flagship effect” fields in the ship designer.  I assume all instances of “weapon type damage bonus” and “other reload bonus” are additive.  For example, 4 Monoliths with their 20% explosive damage fields would give a 20 + 20 + 20 +20 = 80% explosive damage bonus.  Look for the damage bonus of the damage type that you have, look at the reload that you have (Huggy’s does a good job, but I like to calculate reload manually), look at the building damage bonus you have (if applicable), look at your ship or structure dps stat and remember that that is spread across all weapon slots (figure out how many weapon slots you will use), find your critical chance from R&D (and things like the Gridiron Monolith field), and look for critical damage enhancers (critical hits usually deal double damage, but they deal triple damage with the sealed fire charge, and other things in the future may use this stat to increase damage in a nonstandard fashion).

Hold on to your butts.

DPS = ((Base damage of all weapons combined *(1+weapon type damage bonus) * (1+building damage bonus) *(1-critical chance)) + (Base damage of all weapons combined *(1+weapon type damage bonus) * (1+building damage bonus) *Critical chance * Critical damage) + (Ship or structure dps stat * (number of weapon slots filled with damaging weapons / total number of weapon slots) * Cycle time)) / Cycle time

Reminder:  Cycle time = reload + 0.2 * (salvo-1)

If you are attacking ships, remember to multiply this by your accuracy stat (after accounting for specials, etc.), if your accuracy stat is less than 100%.  (You never miss if you are attacking buildings.)  Technically, you have to know the enemy’s evade to get a proper accuracy, but we can’t know that, so I always assume the enemy has 0% evade.  Also, if you are attacking ships, the building damage modifier is irrelevant.

There can be an issue if you use weapons with different cycle times, such as judgment mortars and O/U-10’s on the same ship.  Calculating cycle time can be difficult for those.  I like to use a weighted-average, where I multiply the cycle time of each weapon by the percent of weapon slots meant to deal damage on the hull it occupies, then add them together.  For example, 5 Judgments and 3 O/U-10’s means 5/8 of the Judgment’s cycle time is added to 3/8 of the O/U-10’s cycle time to get an approximation of cycle time.

For multi-shot DPS, George has an article on that here: https://forsakencove.blogspot.com/2017/02/money-shot-er-multi-shot.html

So, there you have it.  If you want to take a quick glance at weapons and figure out which one is better in the abstract, you can do that.  If you want to figure out what goes better on a standard hull, you can do that.  If you want to go super-deep and calculate out the damage on a whole fleet, you can do that.  Using Excel or Google Sheets is a great way to simplify these calculations.  If you name what each cell is to keep track and use formulas referencing those cells, you can adjust to different builds and compare them very quickly if you copy and paste the formulas over a column, then adjust the numbers.

As it turns out, the seemingly-mysterious DPS isn’t so mysterious.  You do need to pay some attention to the blueprint, but it has everything you need to do a quick estimate.  If it’s a choice between weapons on the same fleet, the higher base DPS will usually win, but be mindful of the minimum reload and salvos increasing the cycle time, as that might push a different weapon into the lead.  So, when Kixeye comes out with new tech in the FM, you can take a look for yourself and see if it’s better than the raid tech.

Sunday, May 14, 2017

Arms Race Level 100 Target

A Quick Breakdown


By: George Argyropoulos
a/k/a Dragon Bane   


This is just going to be a quick breakdown of the 100 target in Arms Race to hopefully help some people mitigate some damage. There are other paths and more successful builds, but I only have experience with what I have, so hopefully I can help some players with this. And I'm sort of insistant on driving stacked because, well, I'm lazy. And obstinate.

The first thing I do is take out the front right hand turret cluster. Rather than approach from the front, I go to the side in between the mines. This offers you the chance to engage these turrets without exposing yourself to fire from the turret cluster on the front left.


The only drawback to this is that you either have to run over the mine to get out or wait to time out. Since hitting the mine gives me 20-30 min of damage, I opt to time out and come back in.

The other option, if your tank is good enough (like a Zelos) is to go into the middle and hit it on the side... but to continue...

Once I'm back in and stacked I don't engage the left front turrets cluster, instead I scoot around the dead right hand turret cluster and go into the gap so as to engage the center turret cluster from behind.


This lessens my chances of activating the bloody Coldsnap and again keeps me out of two turret clusters firing on me at the same time.


Doing this also leaves my fleet in an ideal position - it allows me to go back to that second turret cluster on the left and engage it from the back as well.


Then it's off to race past the shrouded mess to pop into the corner beside the next turret cluster. You have to be stacked to get past the shrouded turrets to avoid damage and you need to end up in the corner so as to avoid getting hit by the Coldsnap.


Once there, you can turn just enough to get the Executioner in range and wipe out this cluster. This will also unshroud the mess you just raced past.

Noob tip: You do not have to kill the unshrouded turrets (Thanks to Skadi Nilson  for the tip!). They offer no points. If you don't need the fleets that come in to do any cleaning for you, you can ignore them and continue on. If you need or rely on the fleets to do some cleaning up for you, go back and kill them now so you know how the fleets will proceed.


Next we have to go all the way against the 'wall' of the target and hug it to sneak past the mines so as to engage the next cluster from behind as well.


Then we go to the bottom, hug that wall and engage. There is an issue here as if you are heavy on explosive damage and lower on splash (like this build), you will need to pinch what's left to kill it off. Be forewarned - small pinches do work but the window of opportunity is very small.


After this one, we have one cluster left and you can engage this from a good angle as well. Don't be like me and forget the big building off to the side.


After this it is just a matter of cleaning up the fleets. I tend to stay moving and try and kite them.

This is the latest video of a 100 run. Total damage was about 20 minutes.


The build used in the video:

https://www.dahippo.com/bp/ship/#!y400O0042434303170C445P3852505G572A2A2A2A0NY042434303386M722Y6YC5C557C537C5C5C50NY042434303386M722Y6YC5C557C537C5C5C50NY042434303386M722Y6YC5C557C537C5C5C50NY042434303386M722Y6YC5C557C537C5C5C5dD

Hope this helps some of you! Good luck!

Saturday, May 6, 2017

All code is guilty until proven innocent!!

By: Robyn Piatt
a/k/a Roo

"No amount of testing can prove a software right, but a single test can prove a software wrong"


Kix makes a preview server available for us to test and provide them with feedback. They don't have to do this. They can release targets or hulls and functionality without any testing from us the players and then we have no opportunity to share our concerns or observations with them.

Kixeye generally tells us in advance what targets are available and what feedback they are looking for. Using the last preview server as an example, this is what was posted in the notice  "Focused on April A-Set targets and May event S-target mechanics and feedback"

With that being said lets talk a little bit about what a preview is and what it is not.

A Preview (test) server is a controlled environment made available to allow testers (players) the ability to test specific targets, hulls or functionality and provide feedback to Kixeye.  While the players are testing, Kixeye is watching the activity in the region for issues with functionality, load balancing and lag, as well as gathering data based on the players activity within the targets.

With the last test we had level 84 and level 100 targets.  We were asked to hit these targets and provide feed back via a survey at the end of the session. We are given limited time to perform testing and there are limited participant slots available. Kixeye provides each player over 90k in gold coins to allow the player to build and rank fleets and have free repair while testing


What a test sever is not......


It is not a place for you goof off. If you are asked to test a specific item then test that item. When we are asked to hit raid targets it does not help if you are out constantly hitting mega hulls or other player fleets for the whole testing period. This is not the time to go out and hit your most hated opponent. It is not a time to go out and smash bases (unless this is part of the test) This does nothing but waste time and skew the data Kixeye is collecting. We all tend to pull out that one fleet that we never use at the end of the test and take it for a spin while on free repair but 99% of the time is spent validating the proper functionality.

It is not a place for you if you are brand new to the game and don't understand what is being asked of you for testing. Again, there are limited slots. If you are not familiar with the mechanics of what is being tested then it might be better for you to wait until you are a little more advanced in the game. It also does not help if you are a low level player that does not have the necessary tech components needed to perform the necessary testing. If you don't have the stuff to build the requested fleets correctly, then the information Kixeye collects is invalid.

If you hit a target in the test....finish the target. There is nothing worse than trying to test something and you have to spend 20 minutes of an already extremely short window clearing out targets to get another one to spawn. You have 90k in gold. Use it for repairs and finish the target and then go back into your base and tweak your fleet. There are people that take the time to live stream while on the preview so that others that did not make it in can see the targets as well. Again, not cool having to drive around to find a new target.

"How do I get rid of the shroud? If you make it onto the test server and are a little lost on how to hit the targets, watch a couple of people hit targets to see what you are missing.

If you are going to take part in the preview then be there for the allotted time. Don't log on if you can only spend 20 minutes on the preview. You have taken the spot from another player that does have the time to participate for the full time allotted. If you can't do the time it's a testing crime - there are always videos and information provided afterwards to the community on the many pages available.

Even if you have mastered the target in one go, don't just log off and think you are done. It is not about you and your ability to drive, try other combinations of fleets on the targets, who knows, you might find an error that Kixeye was unaware of. We are not testing to see how good we are, we are testing to make sure the functionality being released is working correctly and does not impact other areas of the game. For example, in the preview just passed, an issue with autoing targets was identified and corrected within the testing window.

While you are in the test server, do not be concerned if all of a sudden a Developer starts to watch your battle while in the preview. They are not spying on you, nor are they going to critique your driving skills (although I am sure they record and laugh at mine later). They are gathering information.

Providing constructive feedback


If you participate in the preview. Fill out the survey. It is always available at the top of the page when you first log in. Click that link so it is open in another page ready for you to fill out when you are done. Once the test is finished the link is gone. The survey asks specific information. It is okay and expected for you to provide negative feedback along with the positive as long as it is clear, event driven and not some major rant. This information is critical to Kixeye. If you fail to fill out the survey or provide the necessary information then you have failed as a test participant.  If we don't give them feedback then we cannot complain about the new functionality later. You have a voice - use it constructively.


Why is it so limited and why do "Special" players get access??


There is a reason for limited slots. Some of this is related to the environment and some of this is related to the ability to track the activity. It does no good having one sever with 5,000 slots with 5,000 people all on chat asking multiple questions and trying to see what builds work or not. There are Kixeye Developers and CM's that are in the preview as well. If they spend the whole time answering questions not related to the actual testing then their time is wasted.

Lately people have gotten upset and cried foul because there are a few players that may have early or guaranteed access to a preview.  There is a reason for this. These players are people that understand the mechanics of the game and the importance of testing and can articulate issues when they arise.  Kixeye has confirmed that these players do not use any of the slots available for the general player access. Ask yourself this.....Do you want 300 random people (that may or may not know what they are doing) or do you want to know there is always a small team of dedicated and knowledgeable players that get guaranteed access that you know will always be there to test and provide feedback and observations. I like knowing that if I cannot get on the sever to test for myself, there will always be a core group I know testing and they will be able to provide information that will help ensure that functionality works, does not cause a massive upset to the game balance, and can provide the correct technical feedback to Kixeye.

Having a preview is a privilege not a right.  Don't squander what we have by fart-assing around doing things that do not provide Kixeye with the necessary information they are looking for.

Roo


Friday, May 5, 2017

Roo's guide to finding stuff on the TFC page!!

By: Robyn Piatt
a/k/a Roo

How to Ninja save and search the The Forsaken Council Facebook Page 


Let's face it....FaceBook is not a forum and although the TFC page is an outstanding repository of information, sometimes you need to find a post or link to a post that had some good information you want to refer to later on.  

Here are some tips for saving stuff for later or using the ninja search with key words to find that post you are looking for.

Lets say George posts a great article on the Monolith build he used in the preview. You know you want to access it to read later on but you are supposed to be at work and not surfing the web (in fact what are you doing reading this - get back to work!!) Rather than look for it later on when you have to spend a bunch of time scrolling down the page looking for the post, here is how you can save an individual FB post. 


Every post has a time stamp under it. 


If you click the time stamp it will open the post in another browser window. 


You can then do many things with this link.  You can save it in your browser favorites to access it later. You can copy the hyperlink to paste in another post or to send in messenger to someone else.  Note - if the post is removed you will no longer be able to access the information.  If the person you are sending the post to is not on the TFC page they will not be able to access it. (But tell them to send a request to join the page so they can benefit from all the information the players share)

FaceBook also has a search function (it is not the greatest but it does help)  You will find the search box either on the top right of the page or on the left hand side of the page.  

Now if you are searching for a specific post it can sometimes bring up a million hits. Lets say you know Renato made a post with a video about understanding deflection that you want to refer back to or share it as a result of a question. You can just type in the word Renato in the search box and spend 4 hours scrolling because  you are going to get a bazzillion hits (Renato shares a lot of great information).  It will bring up any post that has his name on it or he has commented on.  But if you use the word "and" in your search and some other key words you can narrow down the search for less scrolling.

So if you enter the following words in the search bar Renato and Video and Deflection


This is the result you get.

You may need to either widen or narrow your search (try different key words) to catch the post you are looking for but it will really help zero in using key words.  


The same applies to searching for hull builds. If you type in Monolith in the search box  you will get a bunch of posts about the Monolith but they may not all be build posts. You can still review these posts as some people do include builds as a part of the discussion but you can still further narrow it down if you are looking for build only posts. 

Using the words Build and Monolith in the search box you get the following results. This will show posts that have both Monolith and Build in the original post. 


Hopefully this will make your life a little easier when trying to search for stuff on the page. It is not foolproof and is subject to FB changes behind the scenes but it should help.


Roo


Thursday, May 4, 2017

Preview?

A look through the fence...


By: George Argyropoulos
a/k/a Dragon_Bane  


As most of you know, today we got a preview peek at the level 84 and 100 targets for the next Raid. The ever-present caveat is that nothing we have seen is set in stone and is subject to change between today and the start of the Raid next week. As we saw last month, that potential for change can be a substantial one indeed. So - what did we see?

Level 84 :


The 84 was a bit bigger and a little more complex. Someone decided that bringing back the Shrouding mechanic sounded good, so we have that now. The range of the Coldsnaps has increased so that you can no longer out range them. In order to mitigate damage, you now have to approach the target a little differently. You need to come at the Turret Platforms from an angle which will keep you out of the Coldsnap range, like so:


All in all, not too bad a target. I actually liked it. While I can see this getting monotonous after a day or two, this is a target I actually liked. I do wonder how this will translate into the FM - but we'll get to that later,  I'm generally not a fan of complexity in my chores. This is what the target looked like:


As you can see, there are a few new things in this target. The line of shrouded rockets are a new trick. Thankfully, you can outrun these with Icebreakers or Monoliths (stacked).

Level 100 : 


Ok. I have to be honest. I'm not exactly a fan. As most of you know, I abhor large targets, particularly for the Elite level targets. I still feel these targets are the ones that were supposed to save us seat time. The larger the target, the longer it takes. Add in the level of complexity surrounding this target and it didn't hit my Top 15. I mean - just look at the damn size of the thing.

I will say the novelty of the target was fun, however, even in the short time of the preview, I was already rolling my eyes at hitting these. I think my perspective may be skewed because in the back of my mind I keep thinking Forsaken Mission... Forsaken Mission....[1]

Much like the level 84 target, approach was everything. There is a shrouding mechanic again along with a line of shrouded rockets. Fun. A rather large amount of fleets are sitting just off waiting for you as well. I had some trouble with connectivity during the Preview so I had only two recordings of this target. One was full of flames and death, so you get to see the one where I get slapped around a bit. Note where the Coldsnaps fire etc.


And? : 

So what did we learn? We learned that we didn't need as much splash as previously thought. The stacking idea works well. Increasing the damage output helped. MX-3 seemed to be the choice for this Mono build. The adjustment? Removing Viscosity Regulator and swapping in an Explosive Upgrade. Adding a bunch of Charged Armors. A bit of advice... this build is for those that are lazy, but good drivers. It is a skill build on a skill hull. I'm sure I'll find more to tweak, but for now... the DPS build looked like this:


This is the full build here!!

You can read up on the theory behind the build here.

Final note: I am a little aggravated with Kixeye at the moment. The change to the Charged Armors has precluded me from finishing this fleet, so once again, I will not have a full fleet to participate in the raid. 2 out of 3 sucks. That said... Good luck in the raid folks!!

-----------

[1] A serious issue that has yet to be addressed with this new transitional rotation of old targets to chore targets, is a very basic one in this game, that revolves around power creep. In the past, we may have had a target for a chore like the Forsaken Mission release with a difficulty level that precluded any thought of 'fun' or 'easy'. This slowly transitioned into fun and then ease as time went on and we got newer and more powerful weapons and ships. With this new set-up, that will not happen. The difficulty we are presented after the transition is what we will see for the next year. It remains static. Remember the tweaking of the Reaver Armadas? The difficulty certainly was not adjusted towards the 'easy' dial. This is an area that needs to be addressed because I find it hard to believe that I will be doing my FM in 40 min for a couple hours damage when this transitions...


Tuesday, May 2, 2017

Update Musings

Do we need pitchforks? Not really... I think...


by: George Argyropoulos
a/k/a Dragon_Bane   


Today we got a serious update. A new Odyssey Campaign, changes to the Charged Armors, and a serious buff to the Monolith and the Combat Mortar O/U-10. These are my initial thoughts...

Odyssey Campaign :

Given the changes to the Charged Armors, the Monolith and the Combat Mortar O/U-10, this is likely a very much needed TLC in order to allow players to adjust their builds to the changes. The buffs to the Hull and Mortar are likely to change many players builds. It is a good move on Kixeye's part to allow players to adjust at, hopefully, minimal to zero expense - granted, those that can't do the TLC may not be in the same boat.

Initial reactions seem to be that many players are upset that the Gridiron Monolith is available, as well as a 20 day build token. Personally, I am torn about the Gridiron being offered. I would be much happier if the limit were raised to two so that players who already invested in getting one, prioritized it and built it early had a second one they could build in order to have a second tank option for the FM that is to follow this raid set. I think increasing the capacity of the Gridiron is something that should seriously be looked at given that this Raid Set is going to be converted into the new FM.

As for the 20 day token... Honestly, I'm sort of O.K. with this. Those that invested early into the Gridiron have one already built and likely ranked. The one that I am building (in this fleet from this article) takes just under 24 days to build with an officer and R&D level 30. Given the proximity of the raid, I think you can see the thought process behind offering the 20 day build token. I understand than many players are upset at losing out on the 'discount', however, this is offset by their higher level of preparedness. In this instance I can see both sides of the coin and, if I'm honest, this is a good addition to the TLC for the community overall.

Charged Armors : 


At first blush, not having been able to test anything as yet, this seems... complicated. The addition of the resistances and the deflection put this armor on par with the D5 versions, without the repair time. We also get a flat amount reduction as well. If this is how they were rolled out initially, I think things would have been fine. The change however makes us necessitate a comparison.

The flat reduction amount was drastically decreased, as was the total pool amount. I'm not exactly sure how that is going to play out in the raid. With the drastic decrease in up-front reduction, I would think that the pool size would not have been decreased to such an extent.

On the other hand we could look at it comparative to D5 armors and note that you do get a serious mitigation factor above and beyond the D5 versions. The question for the player then becomes - Is this additional mitigation factor with the 10 million price point. That, of course, is up to the individual player. I'm not sure that current targets have been tuned to the armor, I presume the next raid will be (I hope). I think this means that the final judgement on this is going to truly be their performance in the next raid.

Monolith and Combat Mortar O/U-10 :

This is a significant buff to these items. Previous to this players were noting that a Harlock Citadel / R5 Citadel fleet had, on paper and apparently in practice, better damage numbers than the Gridiron / Monolith combination. The addition of the damage stack to the Monoliths (adding 120% damage with four monoliths) as well as the increase n splash, now make the Monolith much more formidable. Again, this is a within-the-hour-first-blush article, so I do need to spend some time playing with these, but it does seem that with the buff to the mortar and hull, this combination now easily surpasses the Hcit/Cit combo.

The buff to the damage of the Combat Mortar O/U-10 helps this in conjunction to being able to get more of them on the Monolith than the Citadel. Can the Citadels be refitted with the Combat Mortar O/U-10? Absolutely, however, it does not offer as much potential for use as the Monolith does.

It seems that with this update, the Monolith is now the best mortar hull in the game currently.

-----------


Side Notes:

- If you are using only 1 Charged Armor, you may want to consider at least 2 of the same type. You'll now need multiples to build up the total pool to be most effective / not run out in the middle of combat.

- If you don't do a hard armor-to-armor swap when adding in charged armors, (say you exchange weapons / specials to put it on), then there is no guarantee that you will see a repair improvement, because you messed with your TTK (time-to-kill).

- Testing stuff against the 112 or 115 is in no way indicative of the tuning for the upcoming raid. Sounds obvious, but when people are testing, they like to try to show old targets as a basis or proof that something "sucks". Next raid targets will determine the worth of these updates.


Monday, May 1, 2017

The Draconian Coaxial

Upon Information and Belief...


By: George Argyropoulos
a/k/a Dragon_Bane


There was a lot of chatter recently about the Draconian Coaxial turret. Particularly with regard to the Secondary Weapon - The Countermeasure half. Most of this chatter revolved mainly around the question of having a Multi-Shot listed and the use of the Hydroxide Coated Barrels. The answer that we previously had was that this special would not work due to the CM being a secondary weapon. This has changed.

This is the second 'correction' that has happened in-game recently that we have not been informed of in an update release. I'm not exactly sure why that is, but with the help of Jefe from the BP Crib we tested this to get some definitive proof. Given this new info, I thought it would behoove the community to make the info available and then spend a little time on this turret.

First let's look at some stills to show that the Hydroxide Coated Barrels now work. This first still shows a turret without the special.


The second one shows a turret with the special equipped. Clearly the pellet count has increased.


Now the question is- is it worth putting on your turret? My answer is no. The reason for this is the fundamental way in which Multi-Shot works, see this article for more info, coupled with the weapon's mechanic.

We first need to step back a little bit and understand how the Secondary Weapon of this turret works. Since it is a splash based weapon the accuracy stat[1] is much less important than the splash stat. Given that it is a Multi-Shot weapon, coupled with the splash based performance, the additional pellets are essentially redundant due to the very low spread (only 4 off-center) that the weapon has - particularly when you start adding splash specials. Of far greater import is the splash. Let's math, shall we?


If you add the Hydroxide Coated Barrels, you gain an additional coverage of about 8 along one axis (since missiles don't spread, we don't care about the other axis too much other than our own spread), 4 in front and 4 in back.

If instead you choose to boost your splash with a special like Sulfide Deployer or Fuel Tank 01-X you will gain a splash bonus of 80%, with a 4 base splash that gives you a splash radius of 7.2 giving you an axis coverage of  14.4.

The splash actually performs better along the other axis as well, which actually mitigates the spread drift of the CM along that axis. Of further note, if you have three slots, you can use both splash specials or some other combination that you'd like. How will this look for a result? Lets see...

With the Hydroxide Coated Barrels:


With splash specials:


As you can see the area of effective counter is larger in the latter. We have to remember, this is not a damage dealing weapon. The addition of pellets in this instance is essentially useless. So... one of the secret sauce combos looks like this:


While it isn't the only option, it is a hell of a splasher. The Countermeasure systems boosts the range of the countermeasure and the splash... well, the splash is still King.

Of note:


  • A-T:R does not affect the secondary part of this weapon.


  • Even though the Draconian Coaxial is not listed in the Retrofit lab under Countermeasure Turrets, this retrofit does buff the secondary of the Draconian Coaxial.


-----------

[1] Accuracy, while not wholly significant, does play a part overall in that it determines the point from which spread is calculated for the CM.